HOW TO MAKE HANDMADE SOAP WITH KIDS
We do a lot of projects in our house. The one and only way we do a lot of projects is one rule: keep. it. so very simple. We buy things that come together easily so things don’t turn into a tear-fest. This is supposed to be fun!! Handmade soap has been on my list forever. But I was intimidated by the long list of supplies and how long it would take. So when CandleScience asked if I wanted to try out their new line of soap making products, I was all over it.
Um, yes please!
CandleScience offers the best supplies for candle making–we made some amazing soy candles earlier this year–so I knew their soap making supplies would probably be just as awesome.
Learning Well LLC is a participant in the Amazon Services LLC Associates Program. As an Amazon Associate, I earn from qualifying purchases. Affiliate links from Amazon or other programs are used on this website. For more info, please refer to our disclosure statement.

How to make handmade soap with kids
First things first, we gathered all the supplies. Everything from the molds to the fragrance is from CandleScience. Here’s our supply list:
- Goat’s Milk Melt + Pour Soap Base
- Soap Fragrance (we used lavender and blood orange)
- Silicone Molds
- Funnel Pouring Pitcher
- Rubber Scraper
- Kitchen Scale
- Mitre Soap Cutting Box (this thing is super heavy and very legit!)
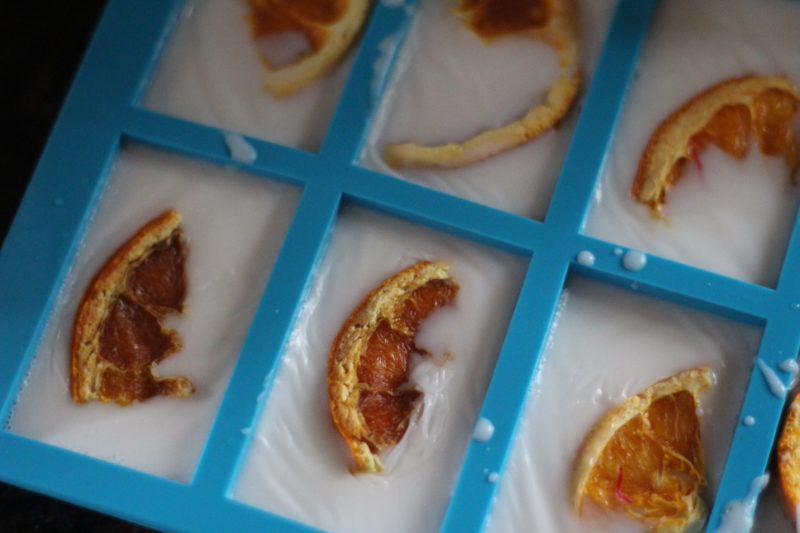
- Dried oranges and lavender (not necessary, but we chose to add this to ours)
- Soap Dye (as desired, we chose to leave ours white)


Goat’s milk soap is my favorite so I was so happy to see that CandleScience was offering it! Using a soap base rather than piecing together our own and all the ingredients that it entails was so much simpler. The soap base was pure and clean and beautiful when we opened the packages.
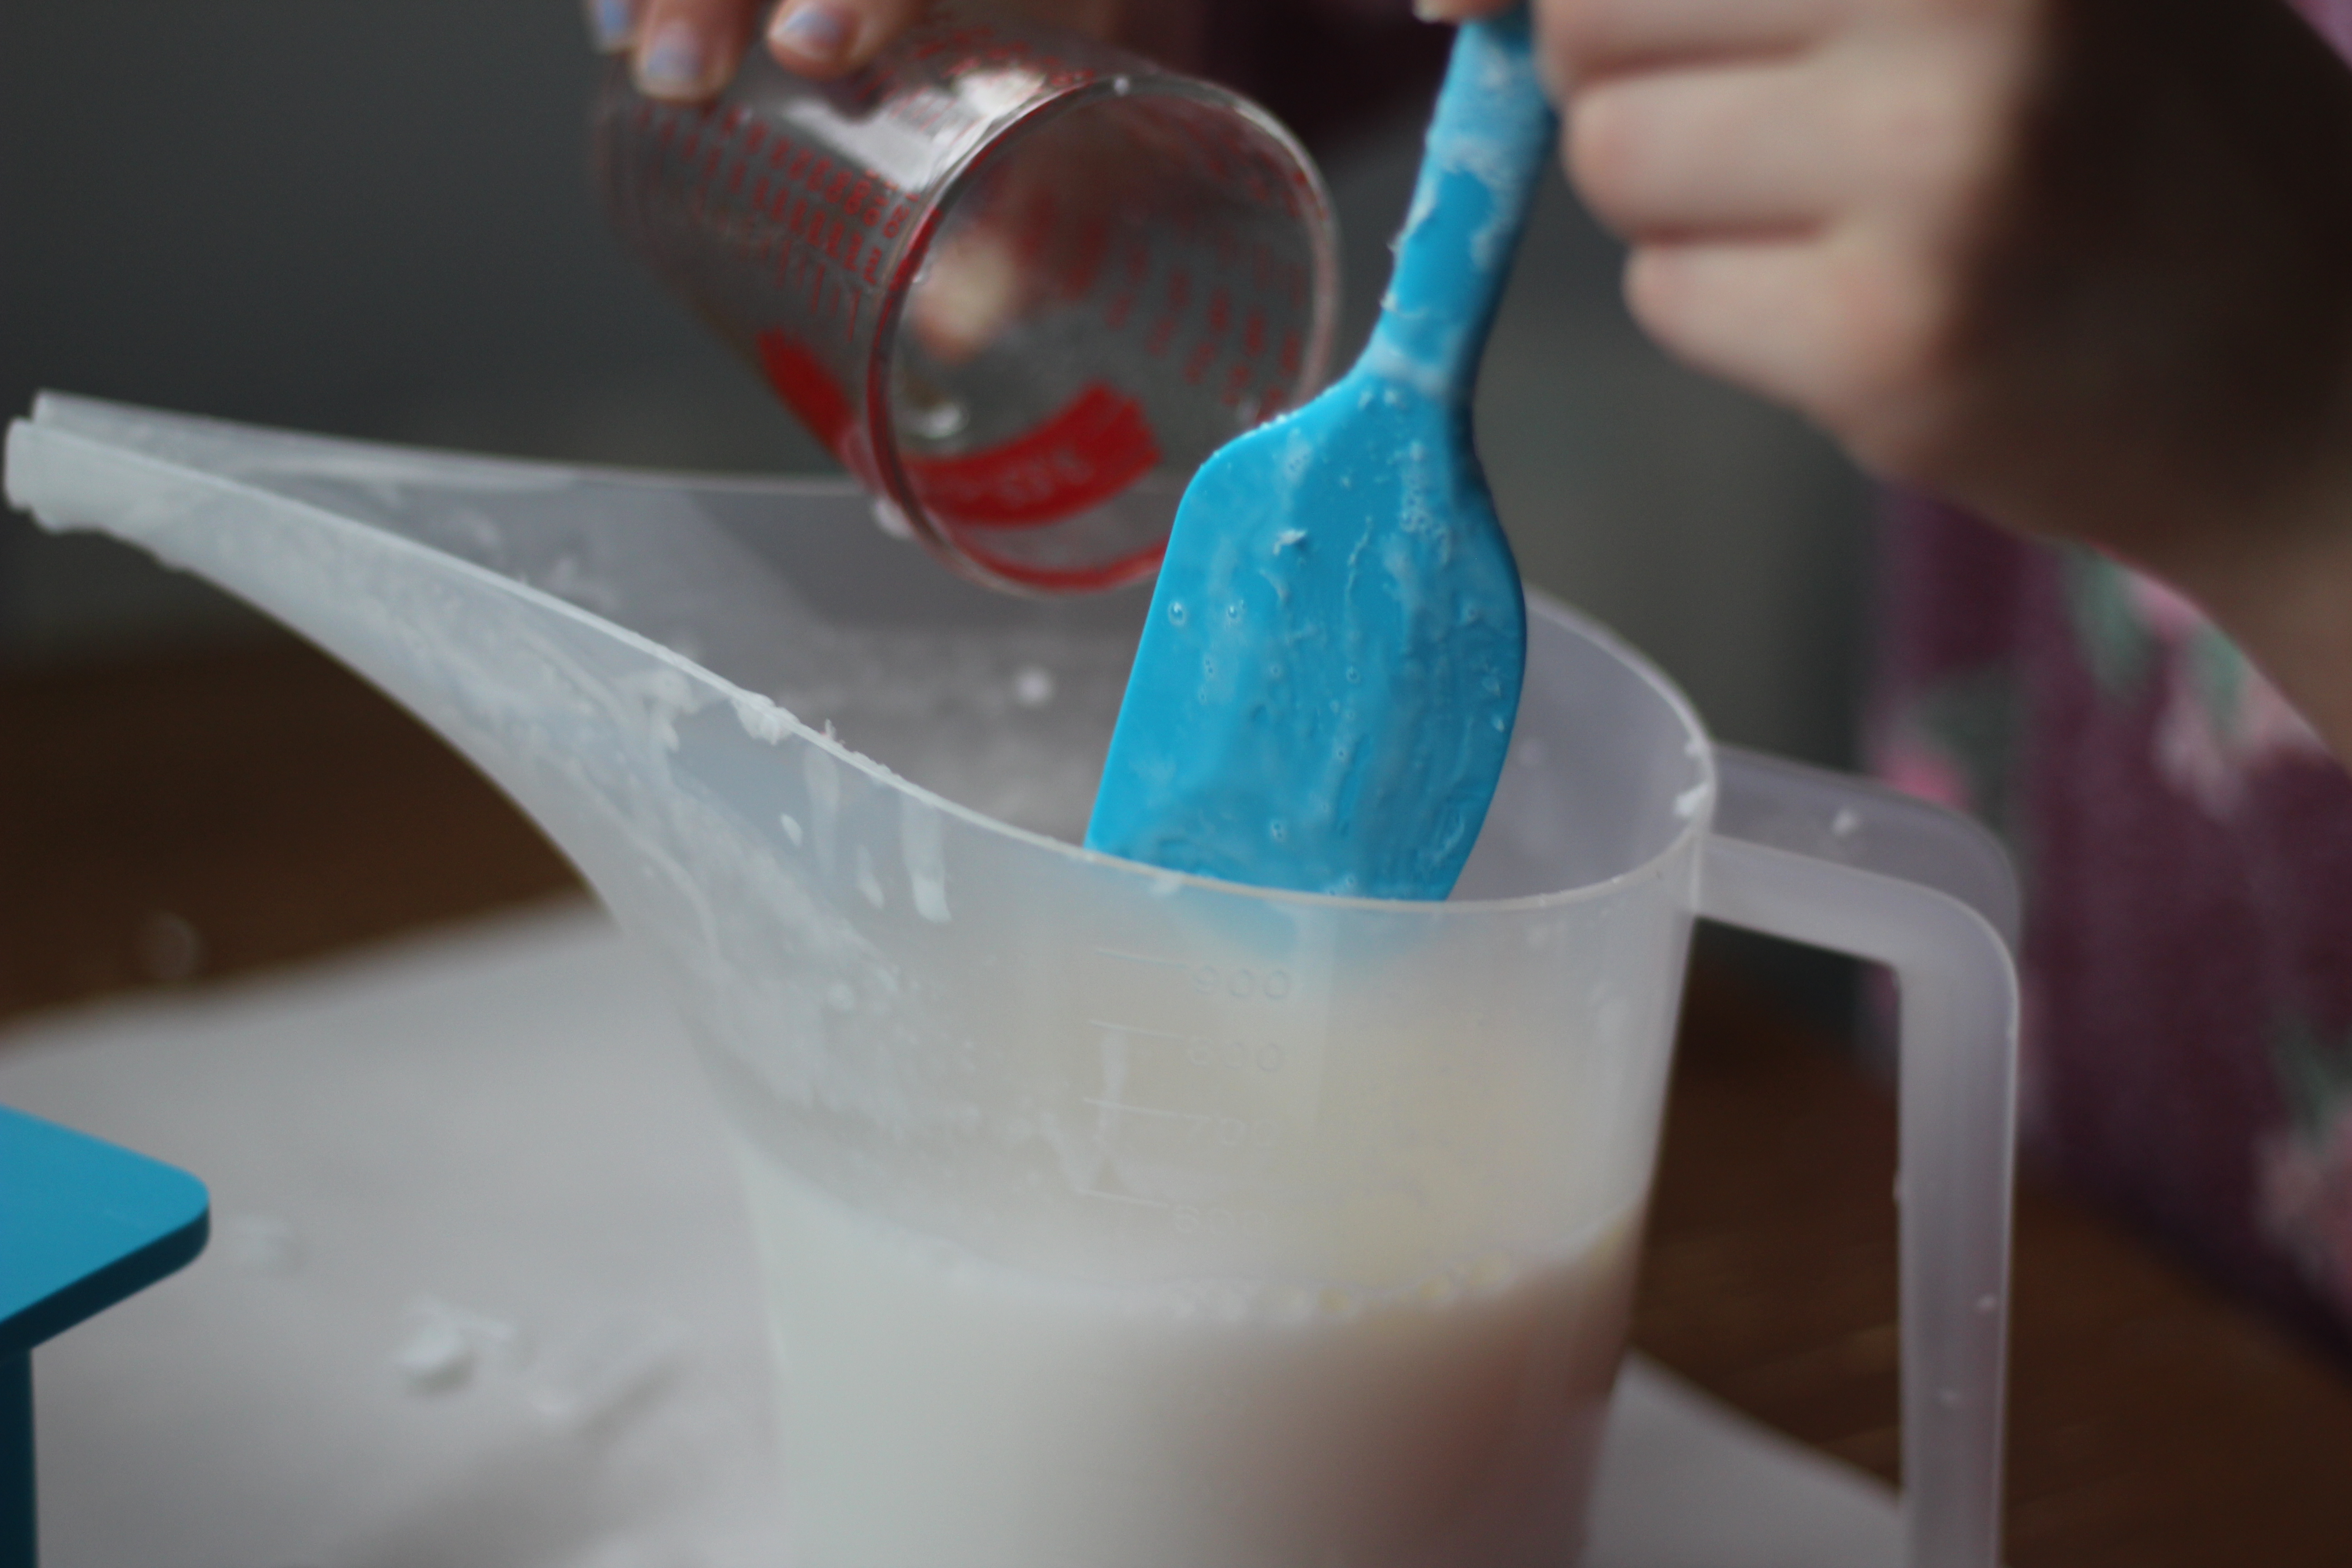
First we cleaned our work area with rubbing alcohol. Then we chopped up the soap base into chunks for easier melting.
Put the soap into the plastic pouring pitcher and microwave in 30 second increments, stirring each time. Keep microwaving until it’s all melted.
It’s a good idea to measure your fragrance before you start melting because you’ll need to add it immediately after it’s melted. We used .5 oz. of fragrance to 1 pound of soap base.


Add the fragrance and stir thoroughly so it’s mixed throughout the soap. Pour into your molds. The soap sets quickly and begins to harden. While it was still liquid, we sprinkled the top of our soap with our dried oranges and lavender. We used the silicone individual soap molds and the loaf mold as well. The loaf mold was then sliced with the mitre box when it was dried.


This is how you make soap with little ones…let them play in the box. They will be happy, I promise.

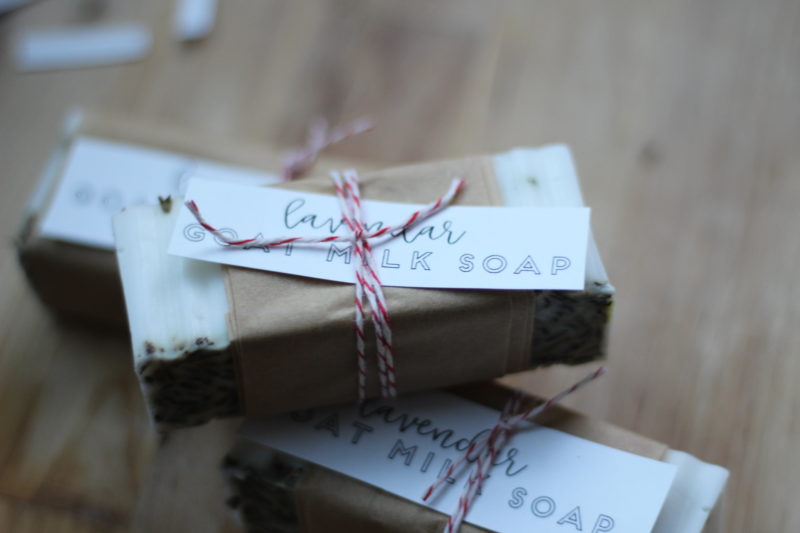
Packaging your handmade soap
We let our soap sit at room temp for about 24 hours before we removed it from the molds and packaged it.
The sky is the limit here! We used unbleached parchment paper and baker’s string, but you could use oodles more supplies!
- Have your kids write out the labels
- Use your stamping supplies
- Use your cardboard Starbucks coffee sleeves
- Let your kids design their own labels on the computer
- Buy some burlap ribbon to wrap your bars
- Bag a few small bars up in wax paper bags and use a sticker to seal it up
- If you preserved any of your fall leaves, use them to wrap your bars of soap

Finally, enjoy your soap! This was such a fun project! Let me know if you’ve tried soap making!
Oh my stars! I am adding this to our homeschool fun list! What a great activity to do with kids:)
These look fantastic! Thanks for sharing such a fun idea. We have never tried it. Maybe one day.