HOW TO MAKE SOY CANDLES

How to make soy candles
- soy wax–I bought a 10 pound bag of Golden brand soy wax #464 and that made just about 24 8oz. candles. I was left with one unfilled jar and one half-filled jar.
- wicks–mine were 6″ pretabbed wicks, and I chose these because they were recommended for the jars I had picked.
- hot glue gun
- clothes pins to hold your wicks in place while you pour
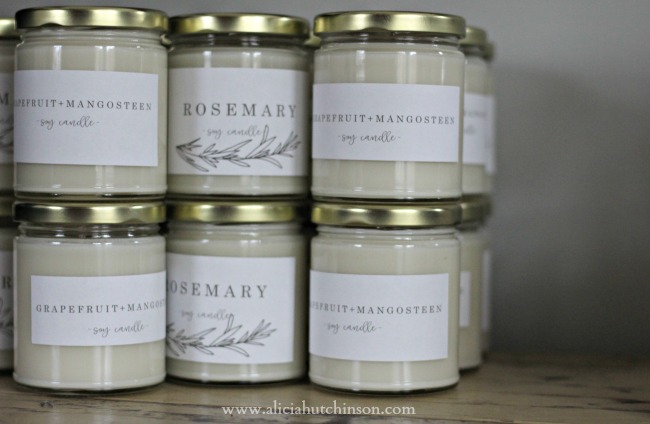
- containers–you can use anything really…thrifted Mason jars, old candle containers…but I wanted mine all to be uniform and smallish and I really wanted something with straight sides for easier cleaning later, so I chose the medium straight sided jars with gold lids
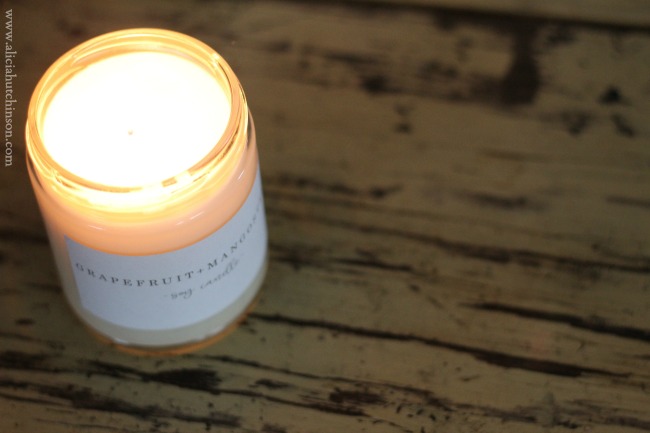
- scents–this is such a personal thing and I prefer really earthy scents, and keeping with a winter theme, I chose grapefruit and mangosteen, blue spruce, pine cones, bayberry and rosemary, but Candle Science has oodles of scents to choose from. I only wish my computer screen had a scratch-and-sniff option to help me choose.
- pouring pitcher–these are absolutely necessary, but having this was so helpful! Also, I didn’t want to use my own cooking pans to melt the wax, so I’m glad I have my own special melting tool now.
- labels


While your wax is melting, get your jars ready. Hot glue the wick to the bottom of the jars and slip the wick through the spring of a clothes pin to hold it in place while you pour.
When the wax is ready, pour away! You don’t have to be stressed about the wax melting or anything like that–this should be a relaxing project! Just pour slowly to keep your jars neat and tidy.
Learning Well LLC is a participant in the Amazon Services LLC Associates Program. As an Amazon Associate, I earn from qualifying purchases. Affiliate links from Amazon or other programs are used on this website. For more info, please refer to our disclosure statement.
Let them sit–untouched–for about an hour and stick your labels on.

I am so happy with how these turned out and I know I’ll be making more. I’m getting ready to order more stuff actually! Why so many candles?? Because they make great gifts for everything–piano teachers, housewarming gifts, birthdays, just-because–you name it! Also because candles make everything cozier and I have them burning pretty much every day–especially in the cold months.
I should note that I did not have my kids help with this project. My older kids could have, but honestly…I just wanted to have some time alone to create. I wasn’t really alone, but I turned my “chill-out” music on and sent the big kids outside, turned on The Little Mermaid for the toddler, and spent a good chunk of time just creating–alone. It was so good for the soul. Sounds weird, but sometimes we just need something that’s just ours.

I did a really quick Periscope of the process, so click here if you want a more visual tutorial.
When I get that storage room cleaned out, I’ll have a whole empty shelf for my candle trove. Now maybe I should light one of these babies and get to work on that blasted room!

Thanks FOR Sharing??♥️ They look GREAT! I Think this Would Be AWESOME Even Though I Use MORE of Essential oils BC candles BOTHER my husband. Maybe It’s the WAX? I know We’ve been at Others houses AND we Both got headaches And I m Sure Mine WAS the smell WAS overwhelming to my senses. My Husband Is Also Asthmatic But The essential oils Don’t bother him! Either Way THEY can STILL MAKE GREAT Gifts!! G-d♥️Bless?
Hi! I just used some shipping labels and designed my own and ran through the printer 🙂 Super simple!
Hello! I was wondering about the label you used. Which brand and which size did you use? Thanks! Super cute!
They look lovely. Maybe it’s my computer monitor but the candles look like a soft gray not white.
Hi! I canNOT remember the exact names for the life of me and they’re on my old computer! Grrrrr! BUT I do know that I got one of them (if not both) from angiemakes.com….she also designed my blog template! Super fun fonts!
Alicia, can you share which fonts you used for the labels? I love them!!
I actually made them. I just used Word on my computer 🙂
Where do you find such simple yet elegant labels
ps. How do the find the lids? It says on the site they dont fit all the way??
I so want to do this! Can I ask you what fonts you used in Word to create the labels? I love them!
Oh my gosh Im so excited to try my hand at these candles. I loved your periscope and even spied a PW cookbook (one of my daughter and I's favorites..hehe) Thanks for sharing
Thank you so much for this post and the Periscope! I ordered supplies and I can't wait to make some candles!
I made mine today! So fun and kind of addicting. I'm excited for my second batch 🙂
❤️ Laura
This looks so fun! And not too complicated to spoil that fun! LOL!
May I ask what the cost per candle ends up being?
Thanks!
Beth
What a great idea and I love your labels! I light candles every single day so I can't wait to try this. Thanks for all of the info.:)
I LOVE candles, and need some more. This sounds like such a fun project. I think I will order some supplies and make my own. 🙂 Thanks for sharing the links.